With PieceX’s new genre PieceX for OSS, it has become possible for Open Source Code users to find and get support for the Open Source Code they are using in their project.
This initiative has begun to gain massive traction by people from the Open Source community. Whether it is developers and contributors offering to provide support plans for their Open Source Code or users trying to purchase support from them.
You may be confused as to how to start, so stay with us till the end and we’ll walk you step-by-step through how to buy an OSS plan on PieceX.
Step 1: Access PieceX OSS
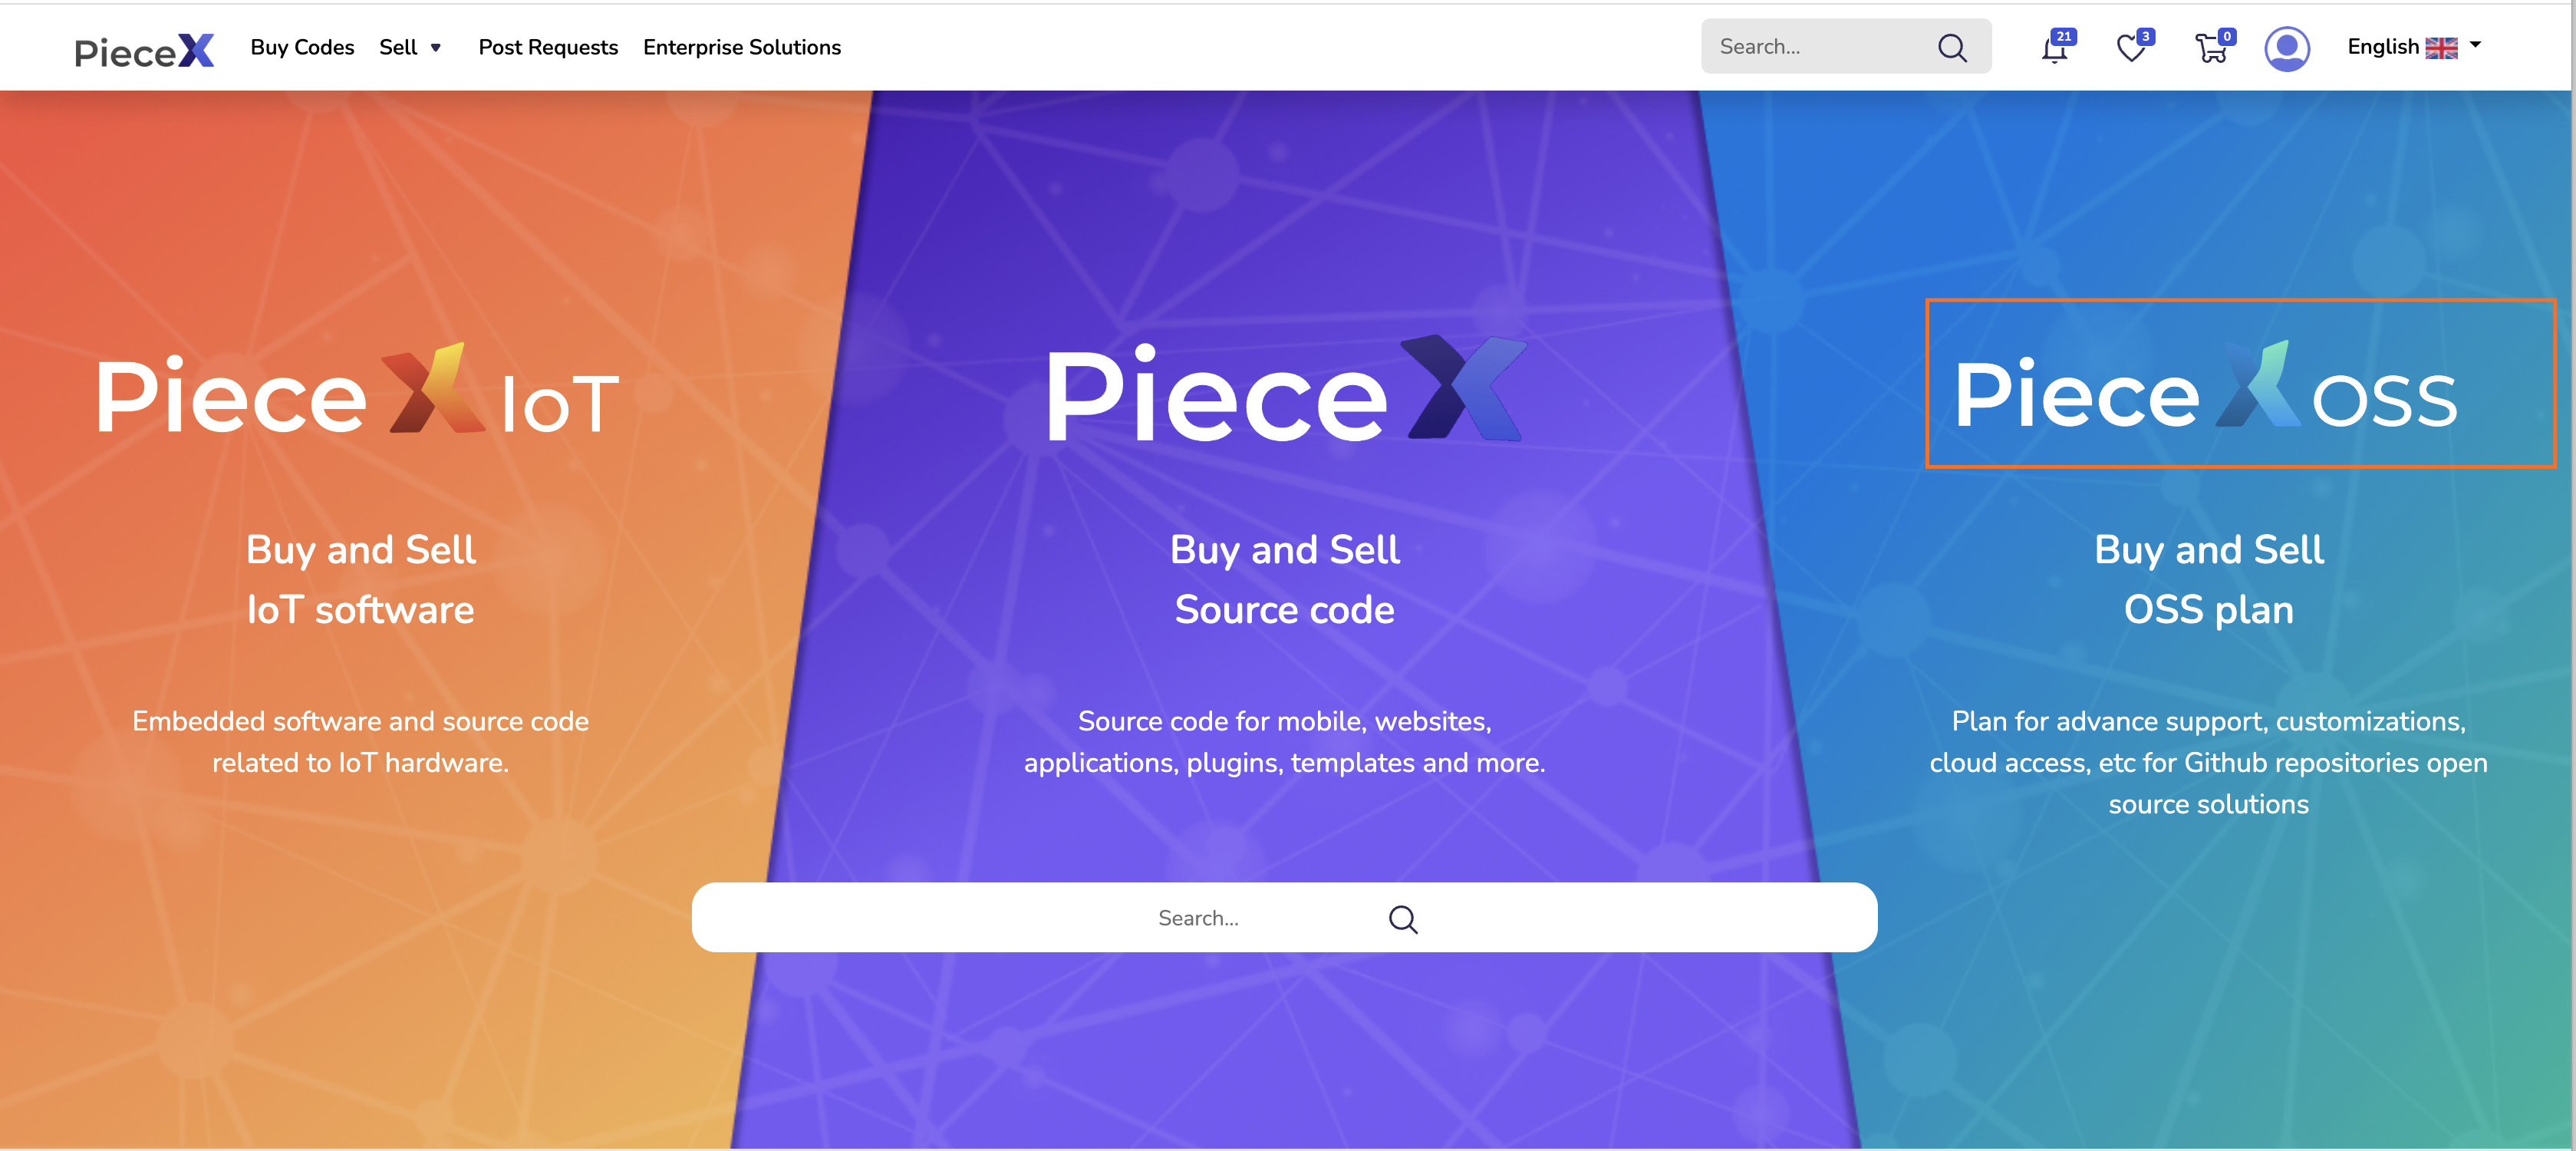
After you log in to your PieceX account, your first step will be to go to the PieceX OSS window of the platform. The cover of the PieceX Marketplace is separated into 3 parts.
You will just have to hover the mouse over the “PieceX OSS” logo at the right and you will be redirected there. You can also access PieceX OSS through here.
Step 2: Select Your Desired OSS
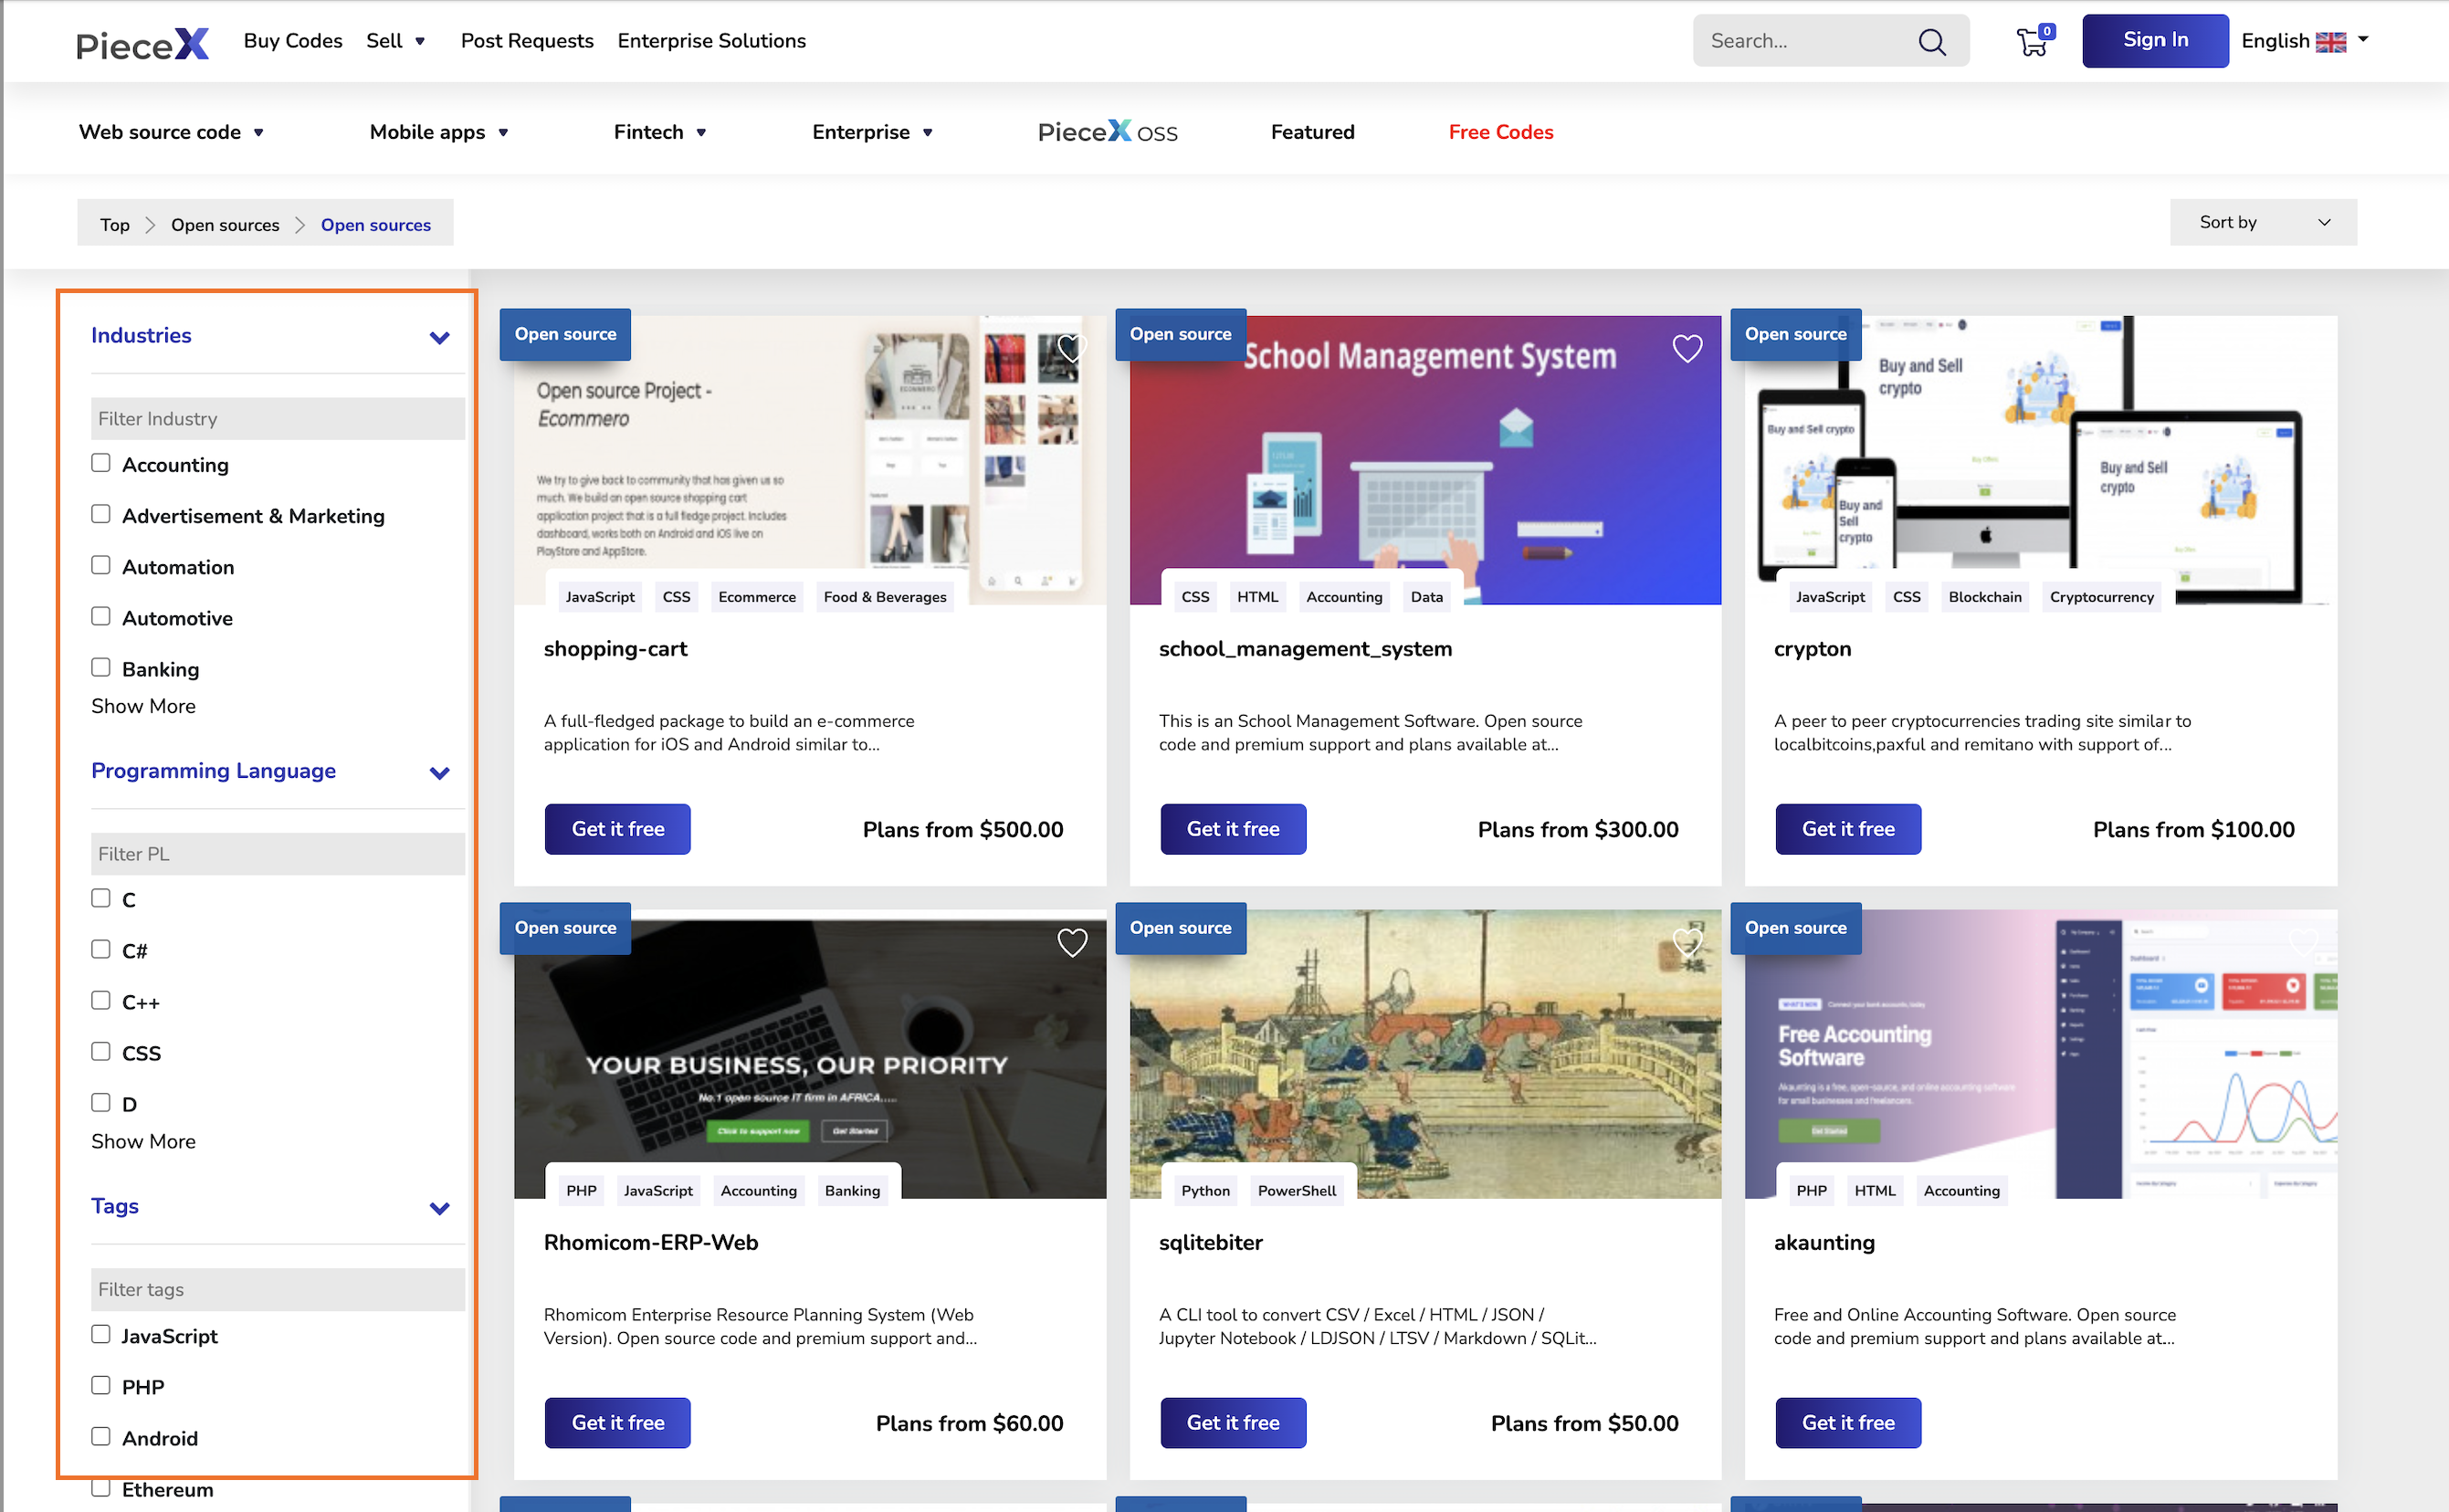
Once you go to the PieceX OSS window, you will be able to browse a large variety of Open Source Code with different support plans in each. Knowing that you are most likely looking for something specific, you can filter through the products using Industry, Programming Language, and Tags.
The filter bar will be on the left and it will help you select the Open Source Project you need support for. Once you do, make sure to click on the picture or title of the Open Source Project to be directed to the product page where you can access the details and plans of the product.
Step 3: Download Code
This is how the page should look like where you can download the Open Source Code for free as well as preview the support plans available. Make sure to inspect the support plans applicable to the Open Source Code in order to know whether it is suitable for you and your project.
Step 4: Review Product
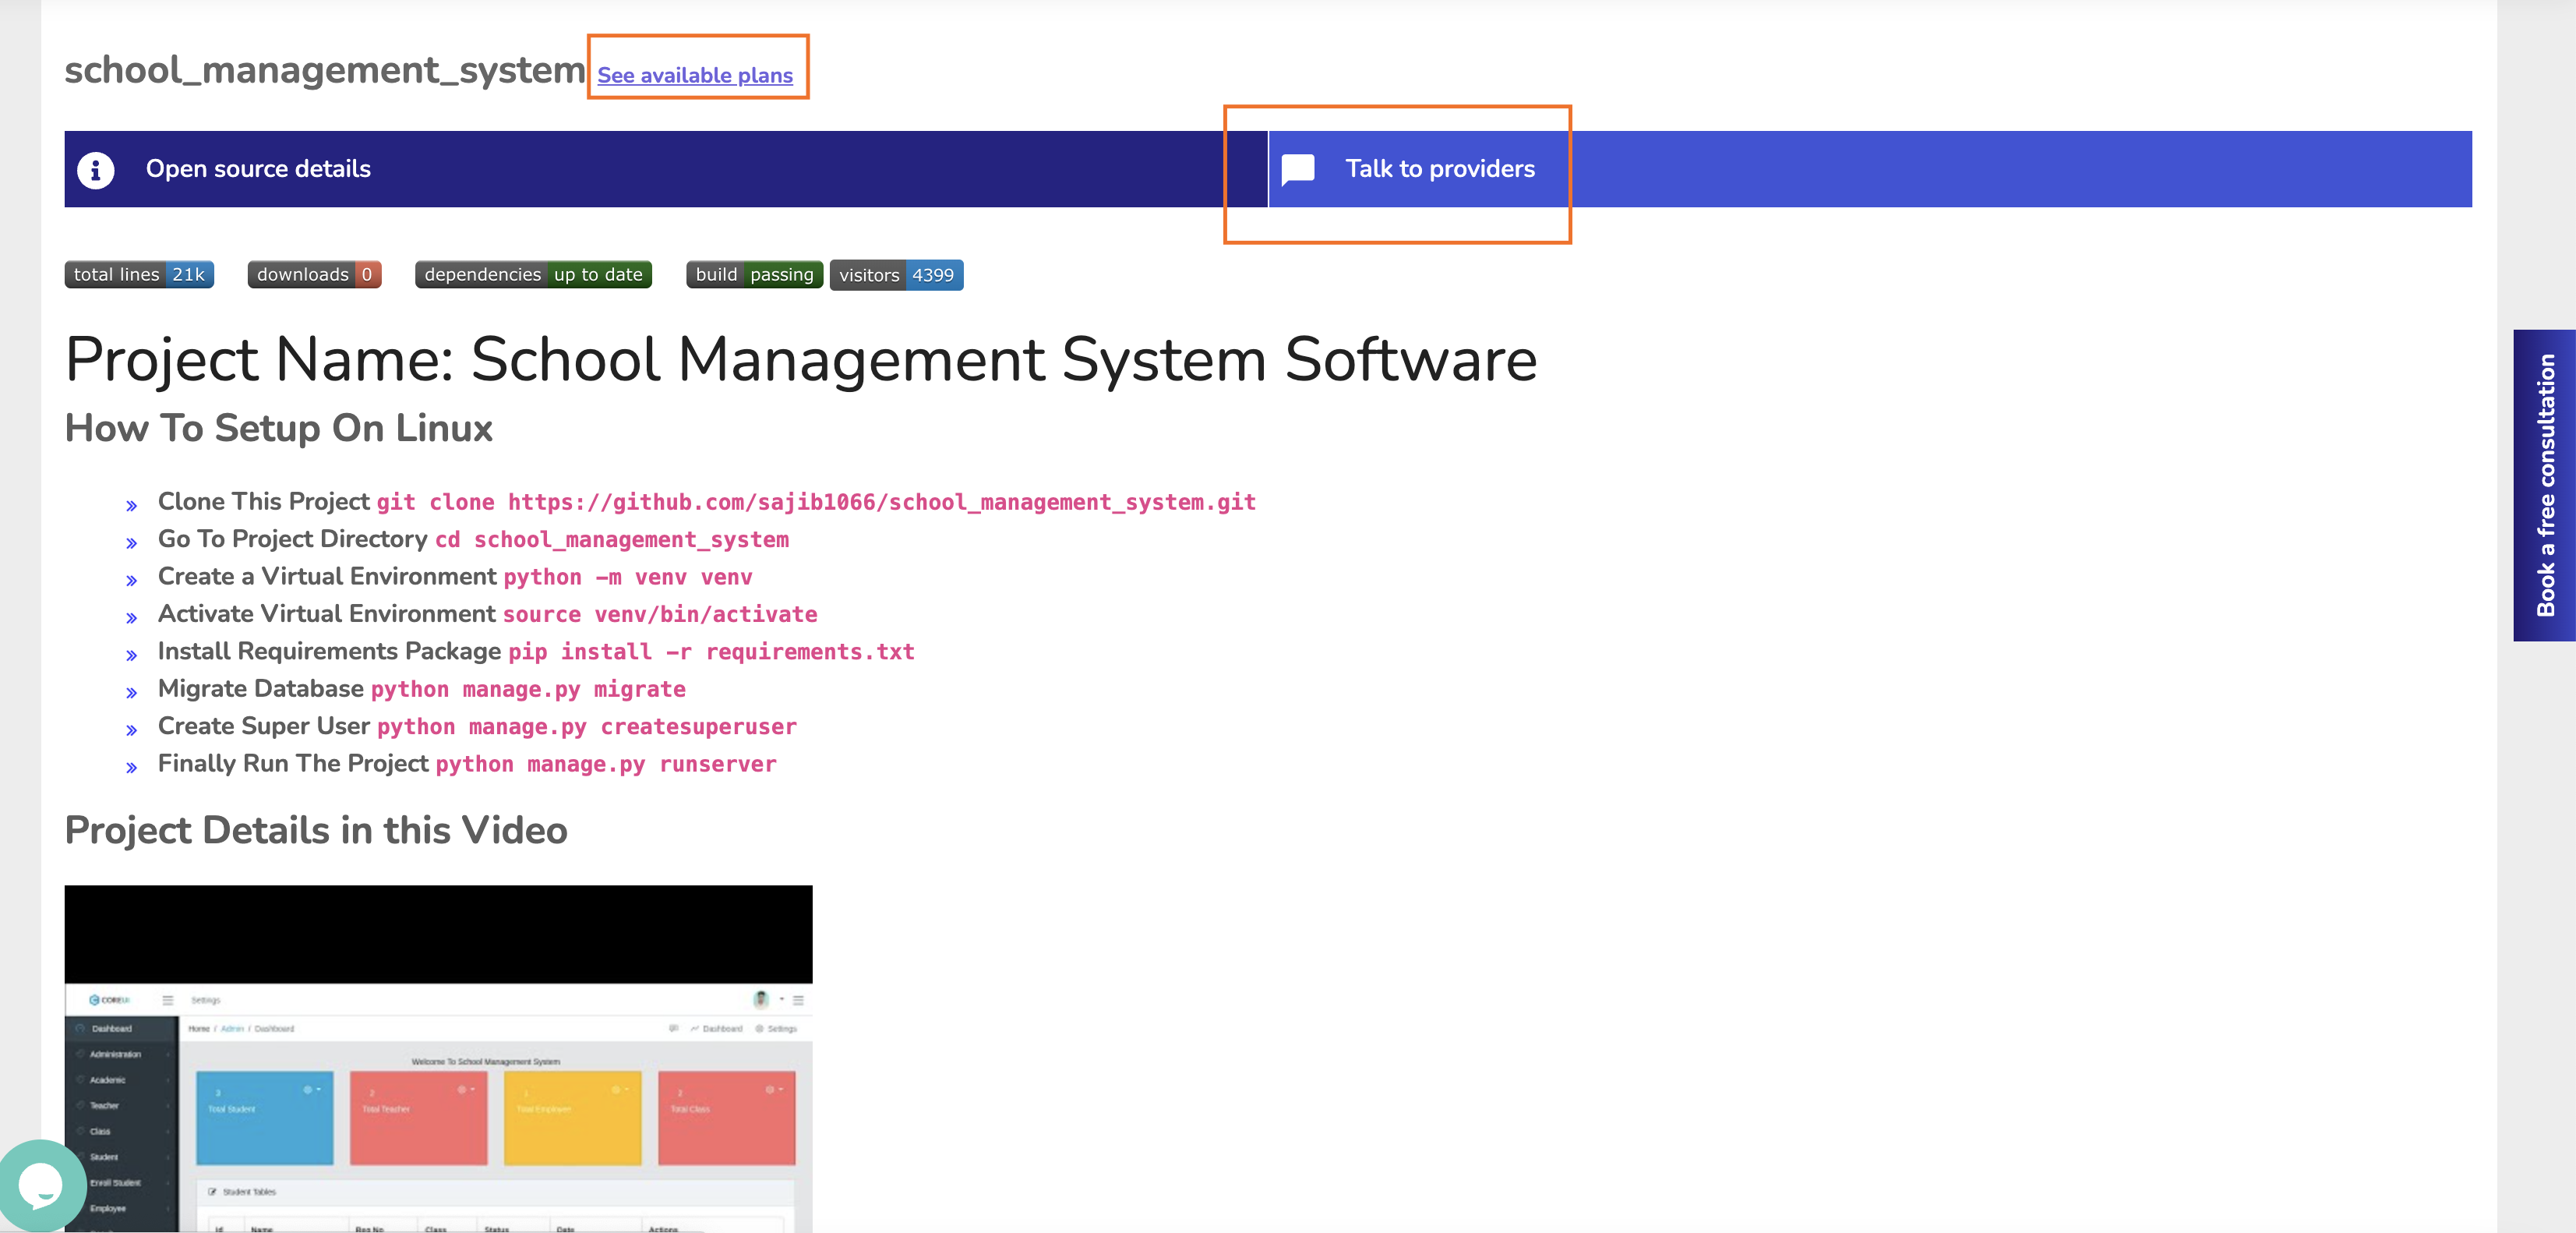
In this section you can review the Open Source Code Project in order to know exactly the description as well as the specifications of it. You can also click on “See Available Plans” to take a look at the plans available for the Open Source Project.
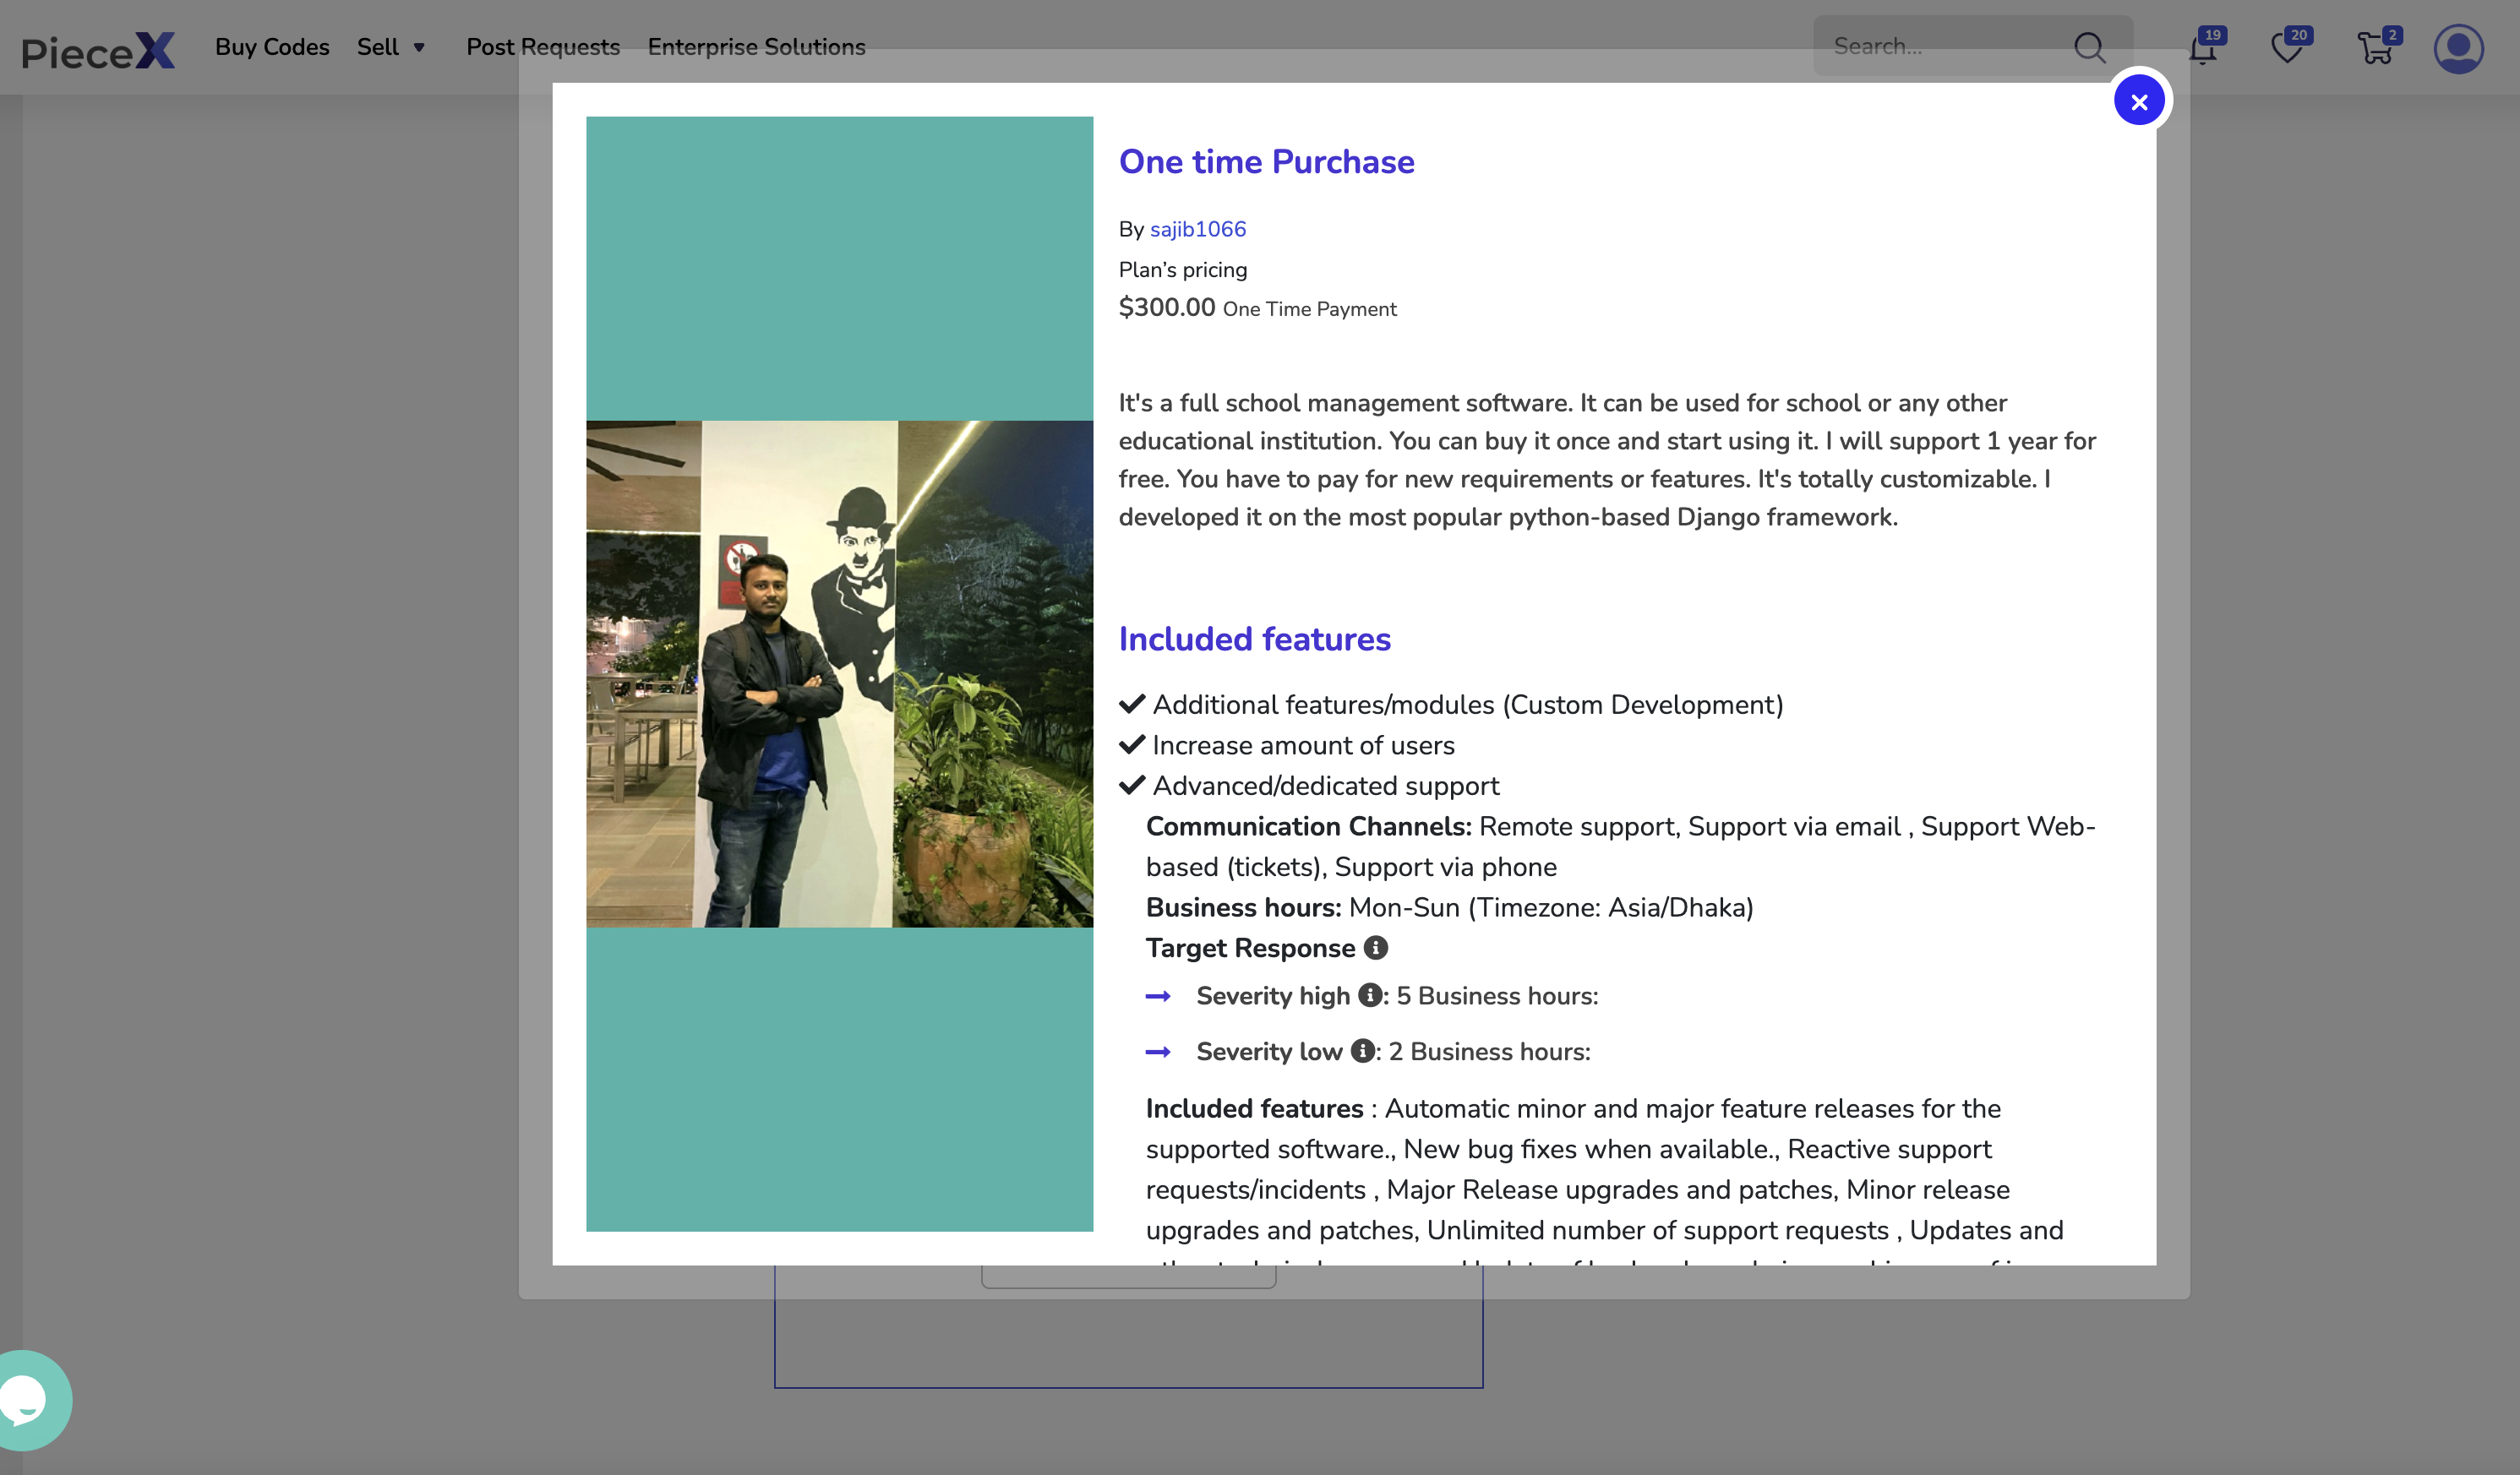
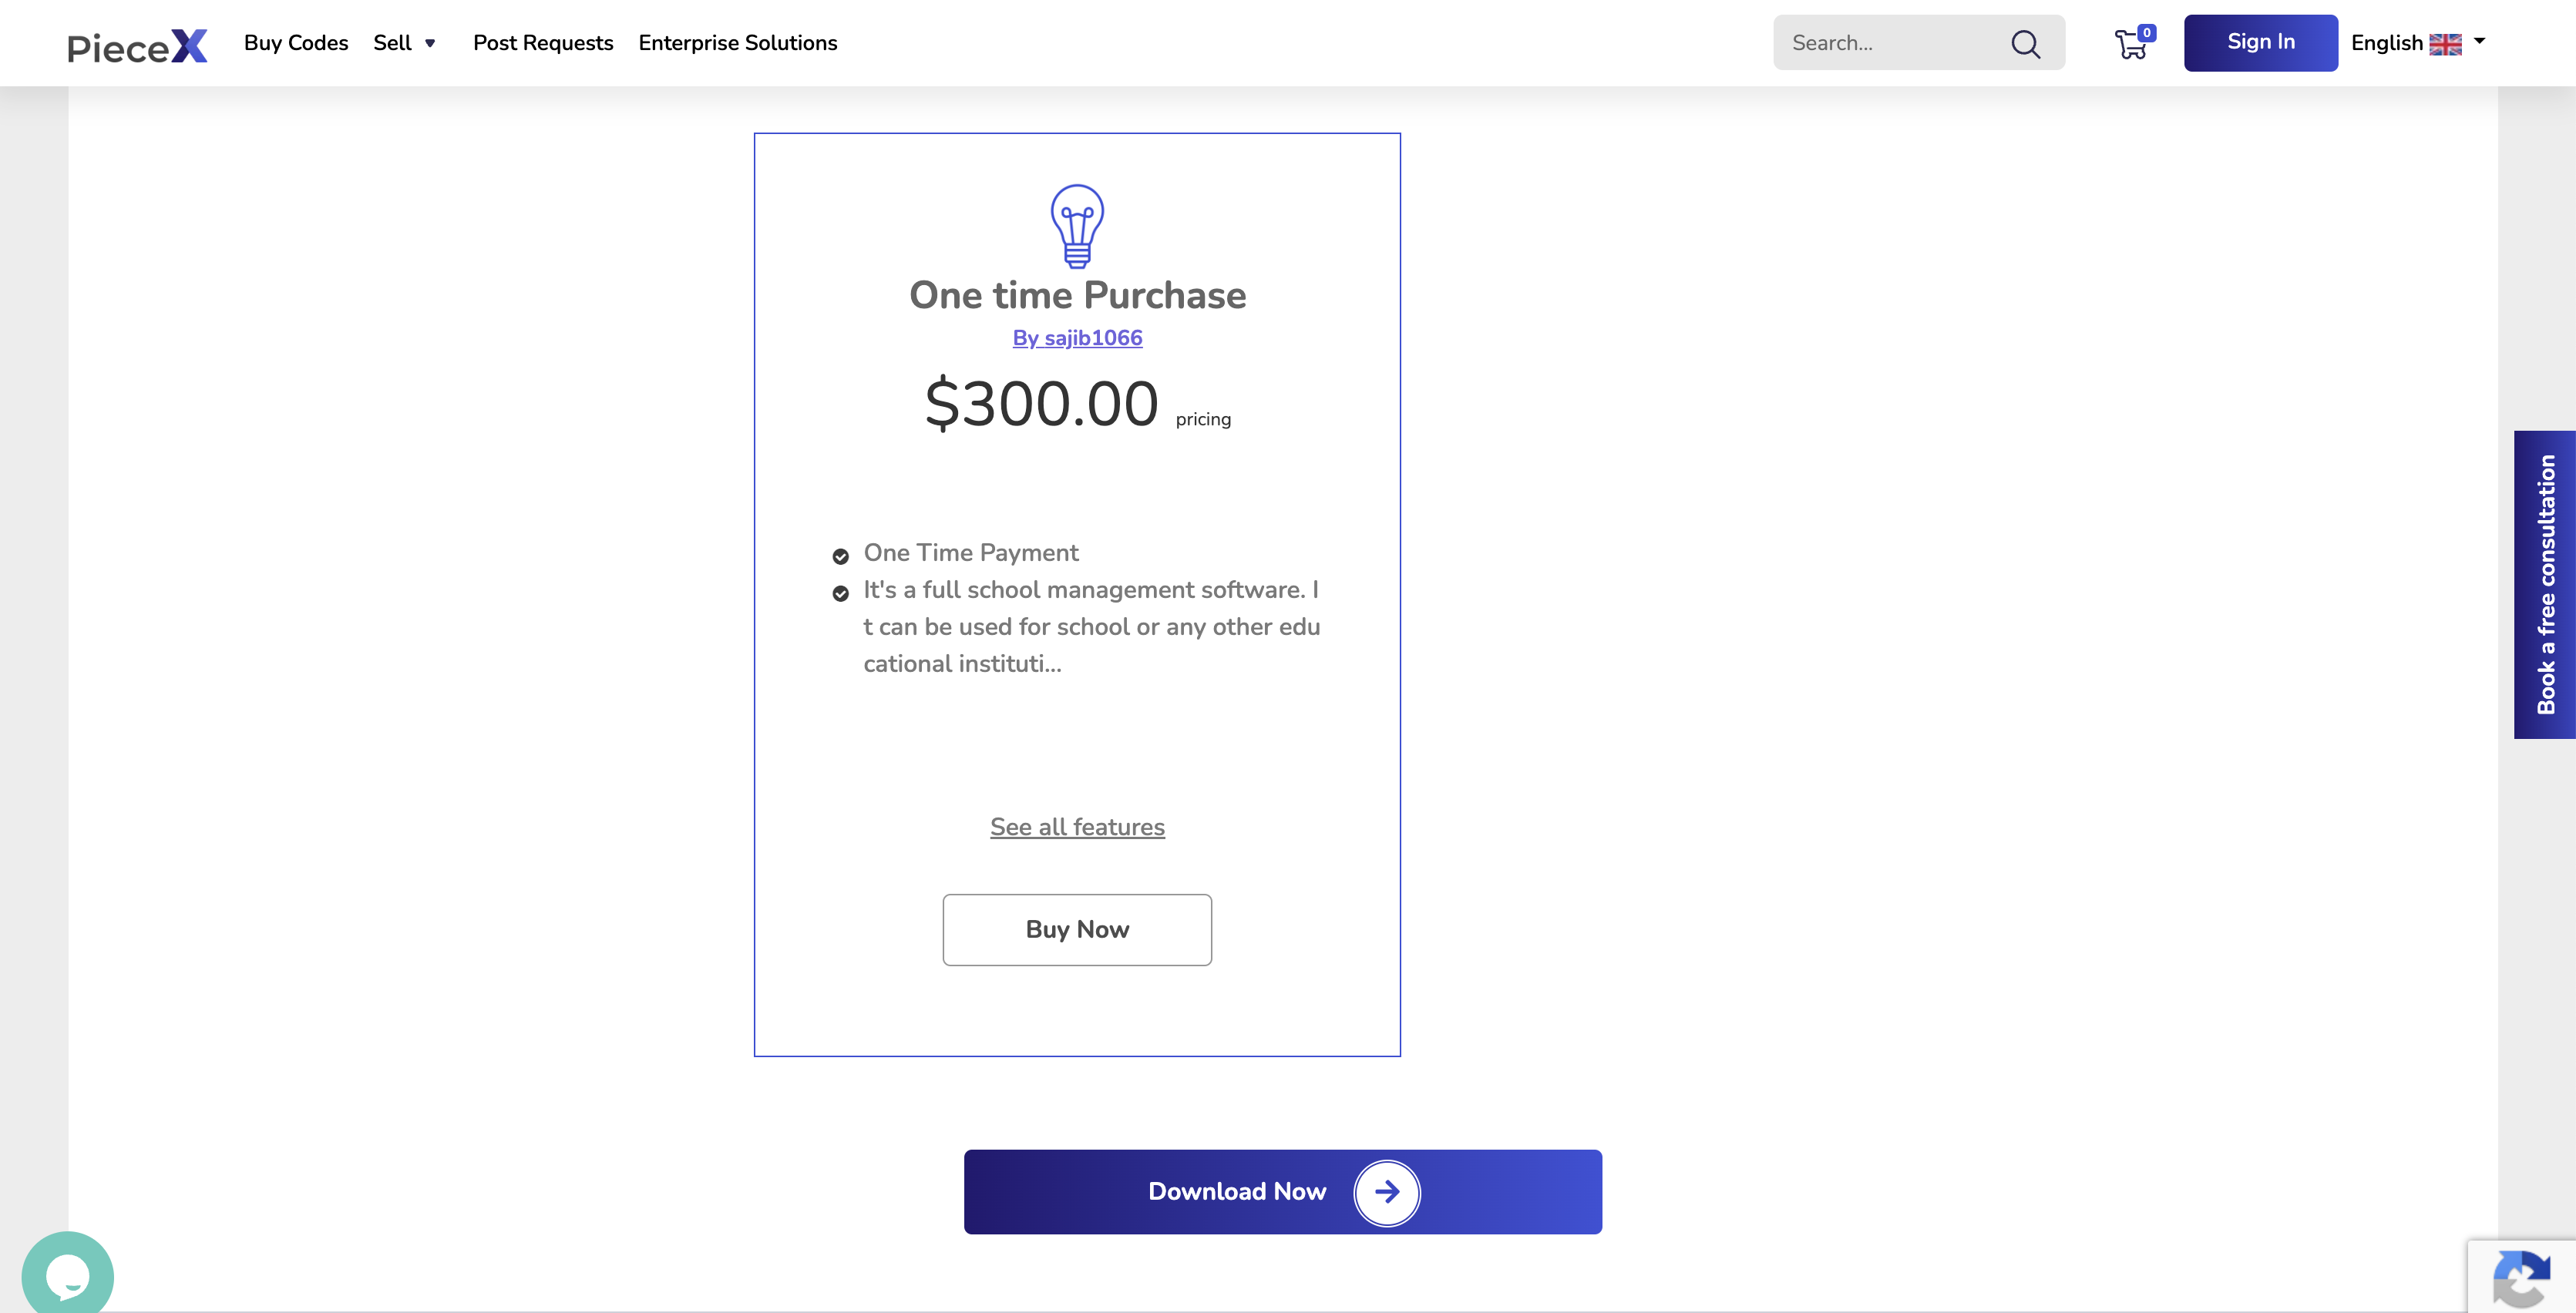
You can inspect the Support Plans from that section and take a look at the specifications of the support provided by the seller of the plan, helping you decide on what plan is most suitable for your project.
As shown above you can check the plan details, it shows the support included by the contributor like additional features, Engineering Hours, Communication channel, and business hours provided.
Step 5: Purchase Plan
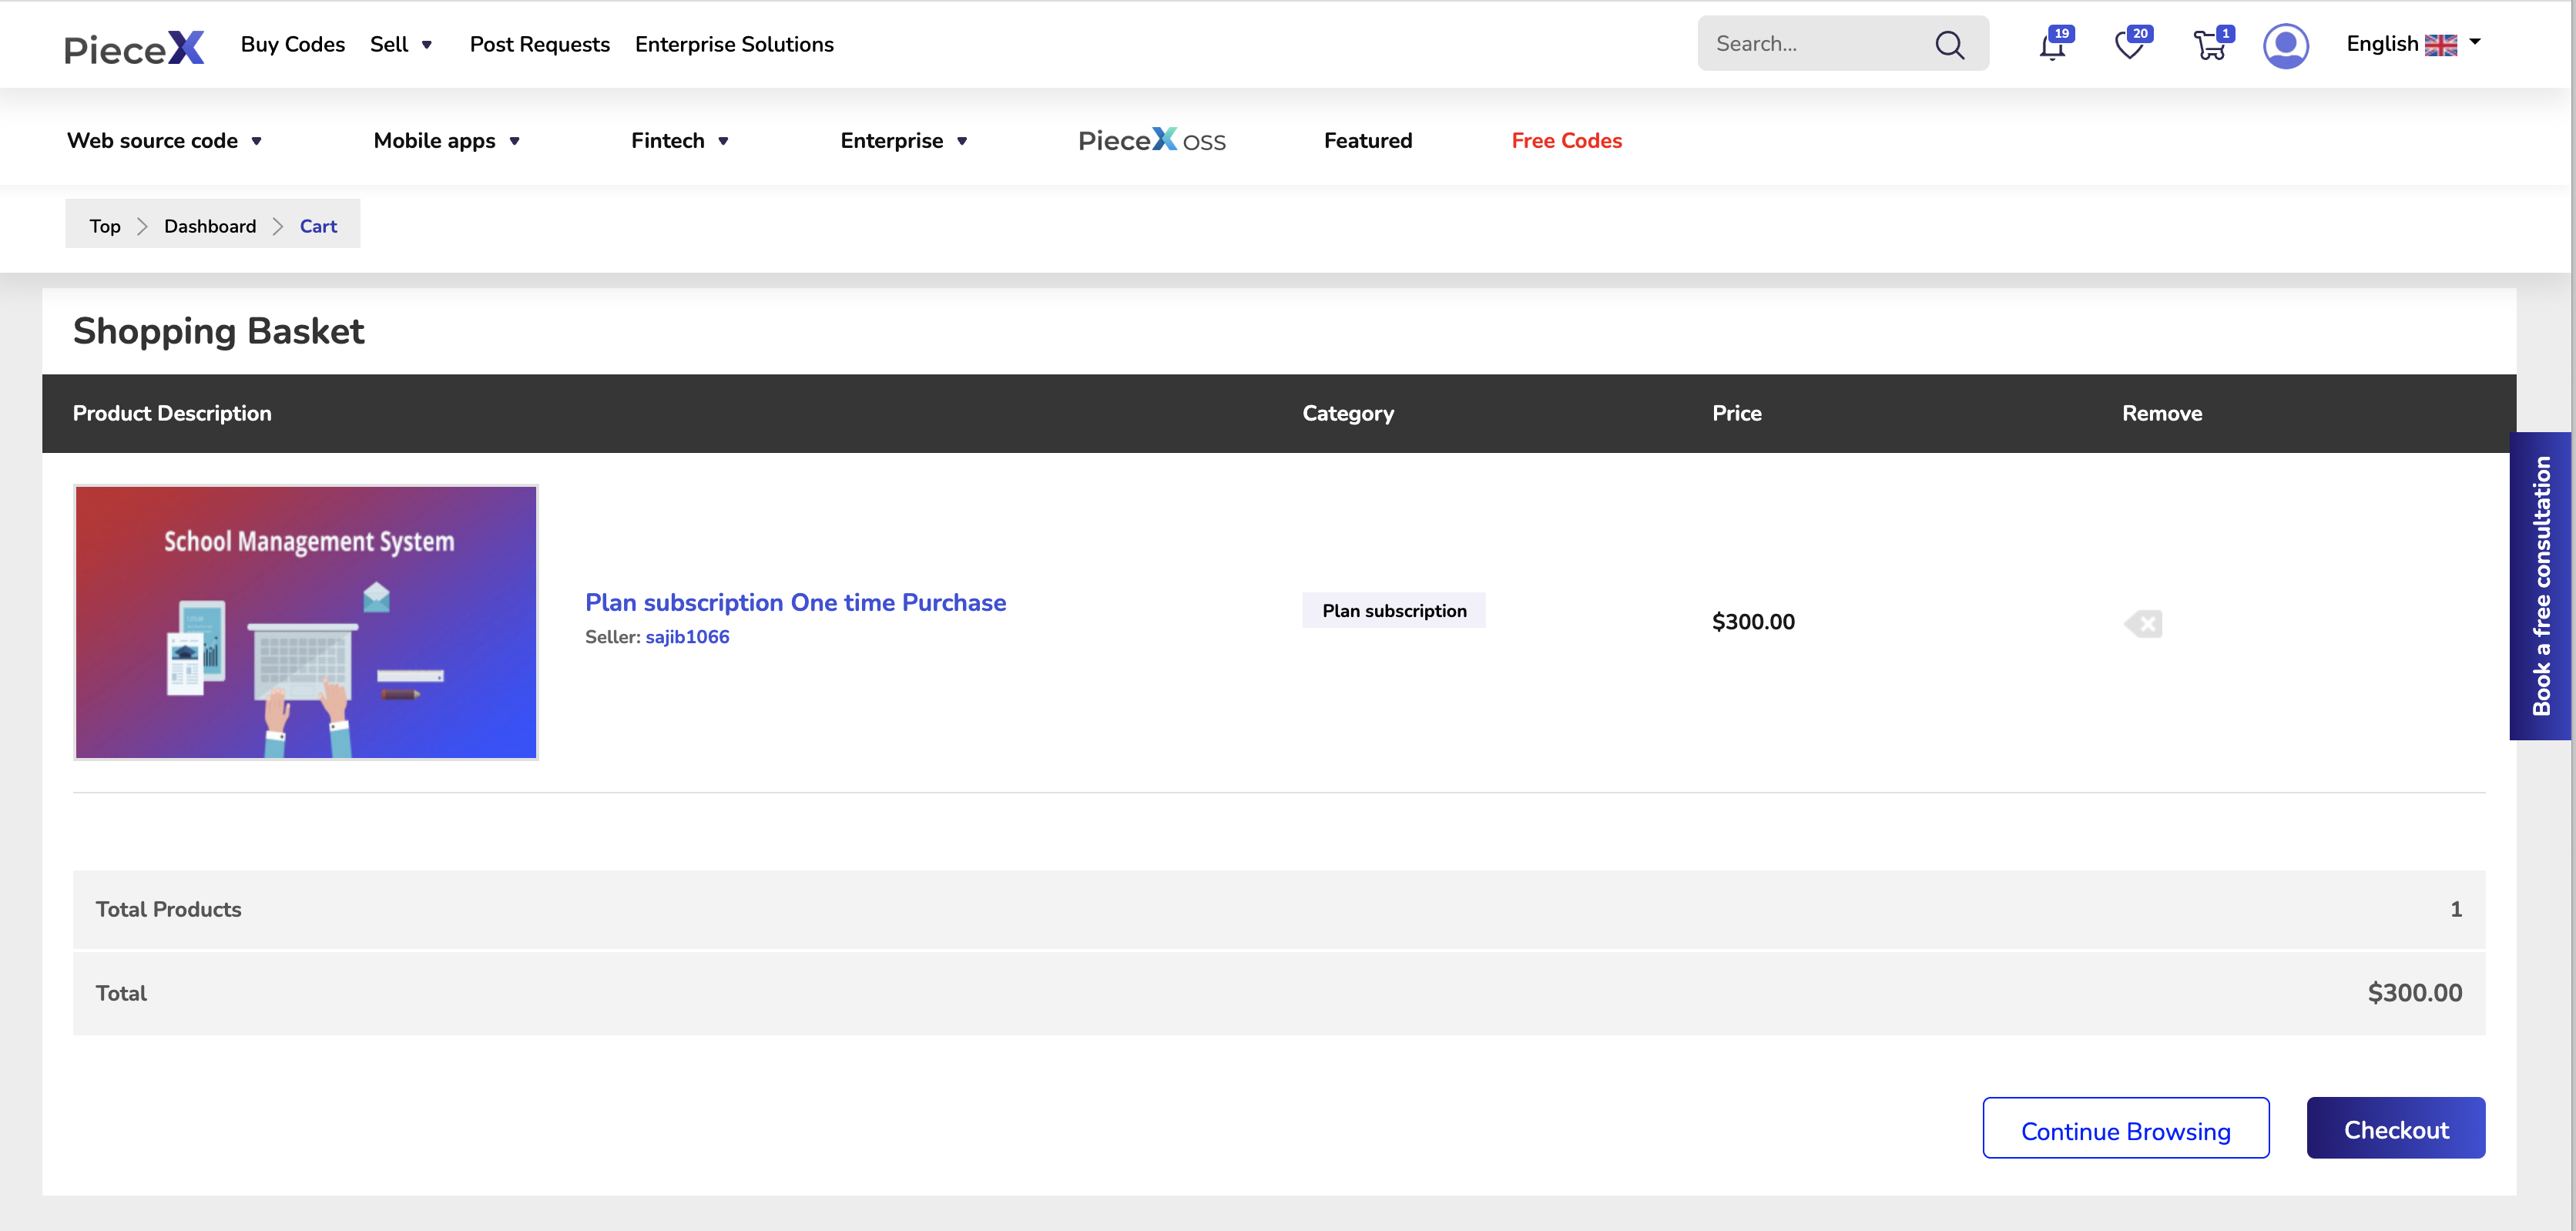
After you download the code and inspect the support plans, pick the support plan most suitable for your project and Add it to cart. Once it is added to cart, head over to your “Shopping Basket” and you will be able to either continue browsing plans and Open Source Code or go to the “Checkout” Page.
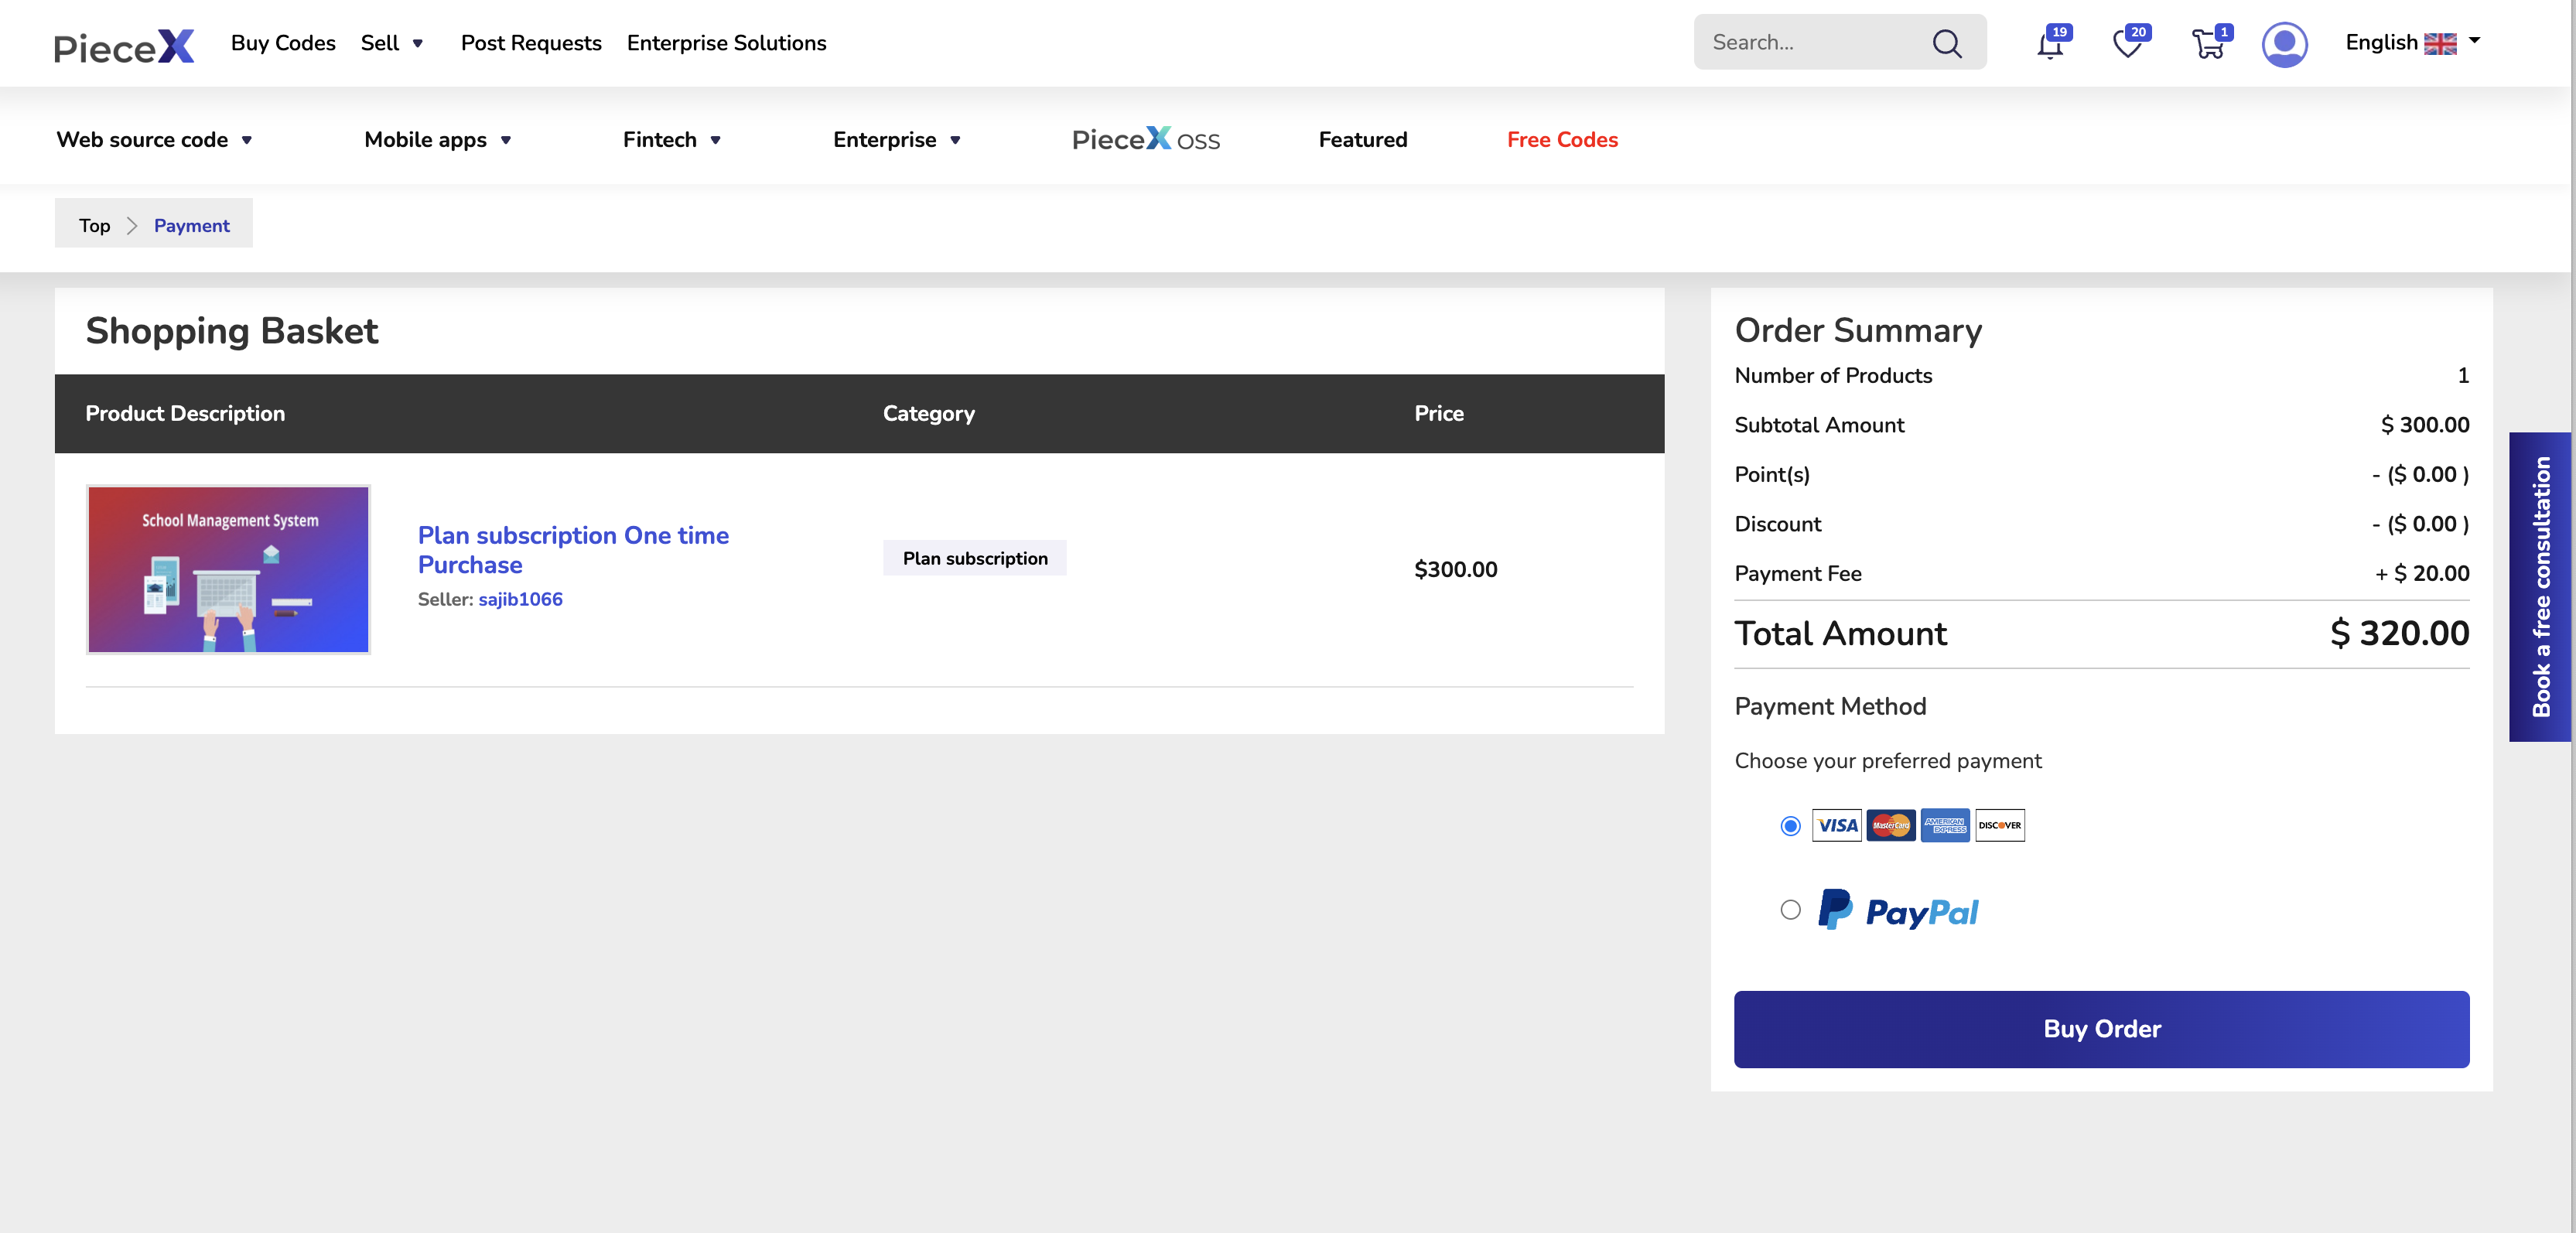
Once you head over to the check out page, you can select your payment preference. You can choose between paying using your credit card or PayPal.
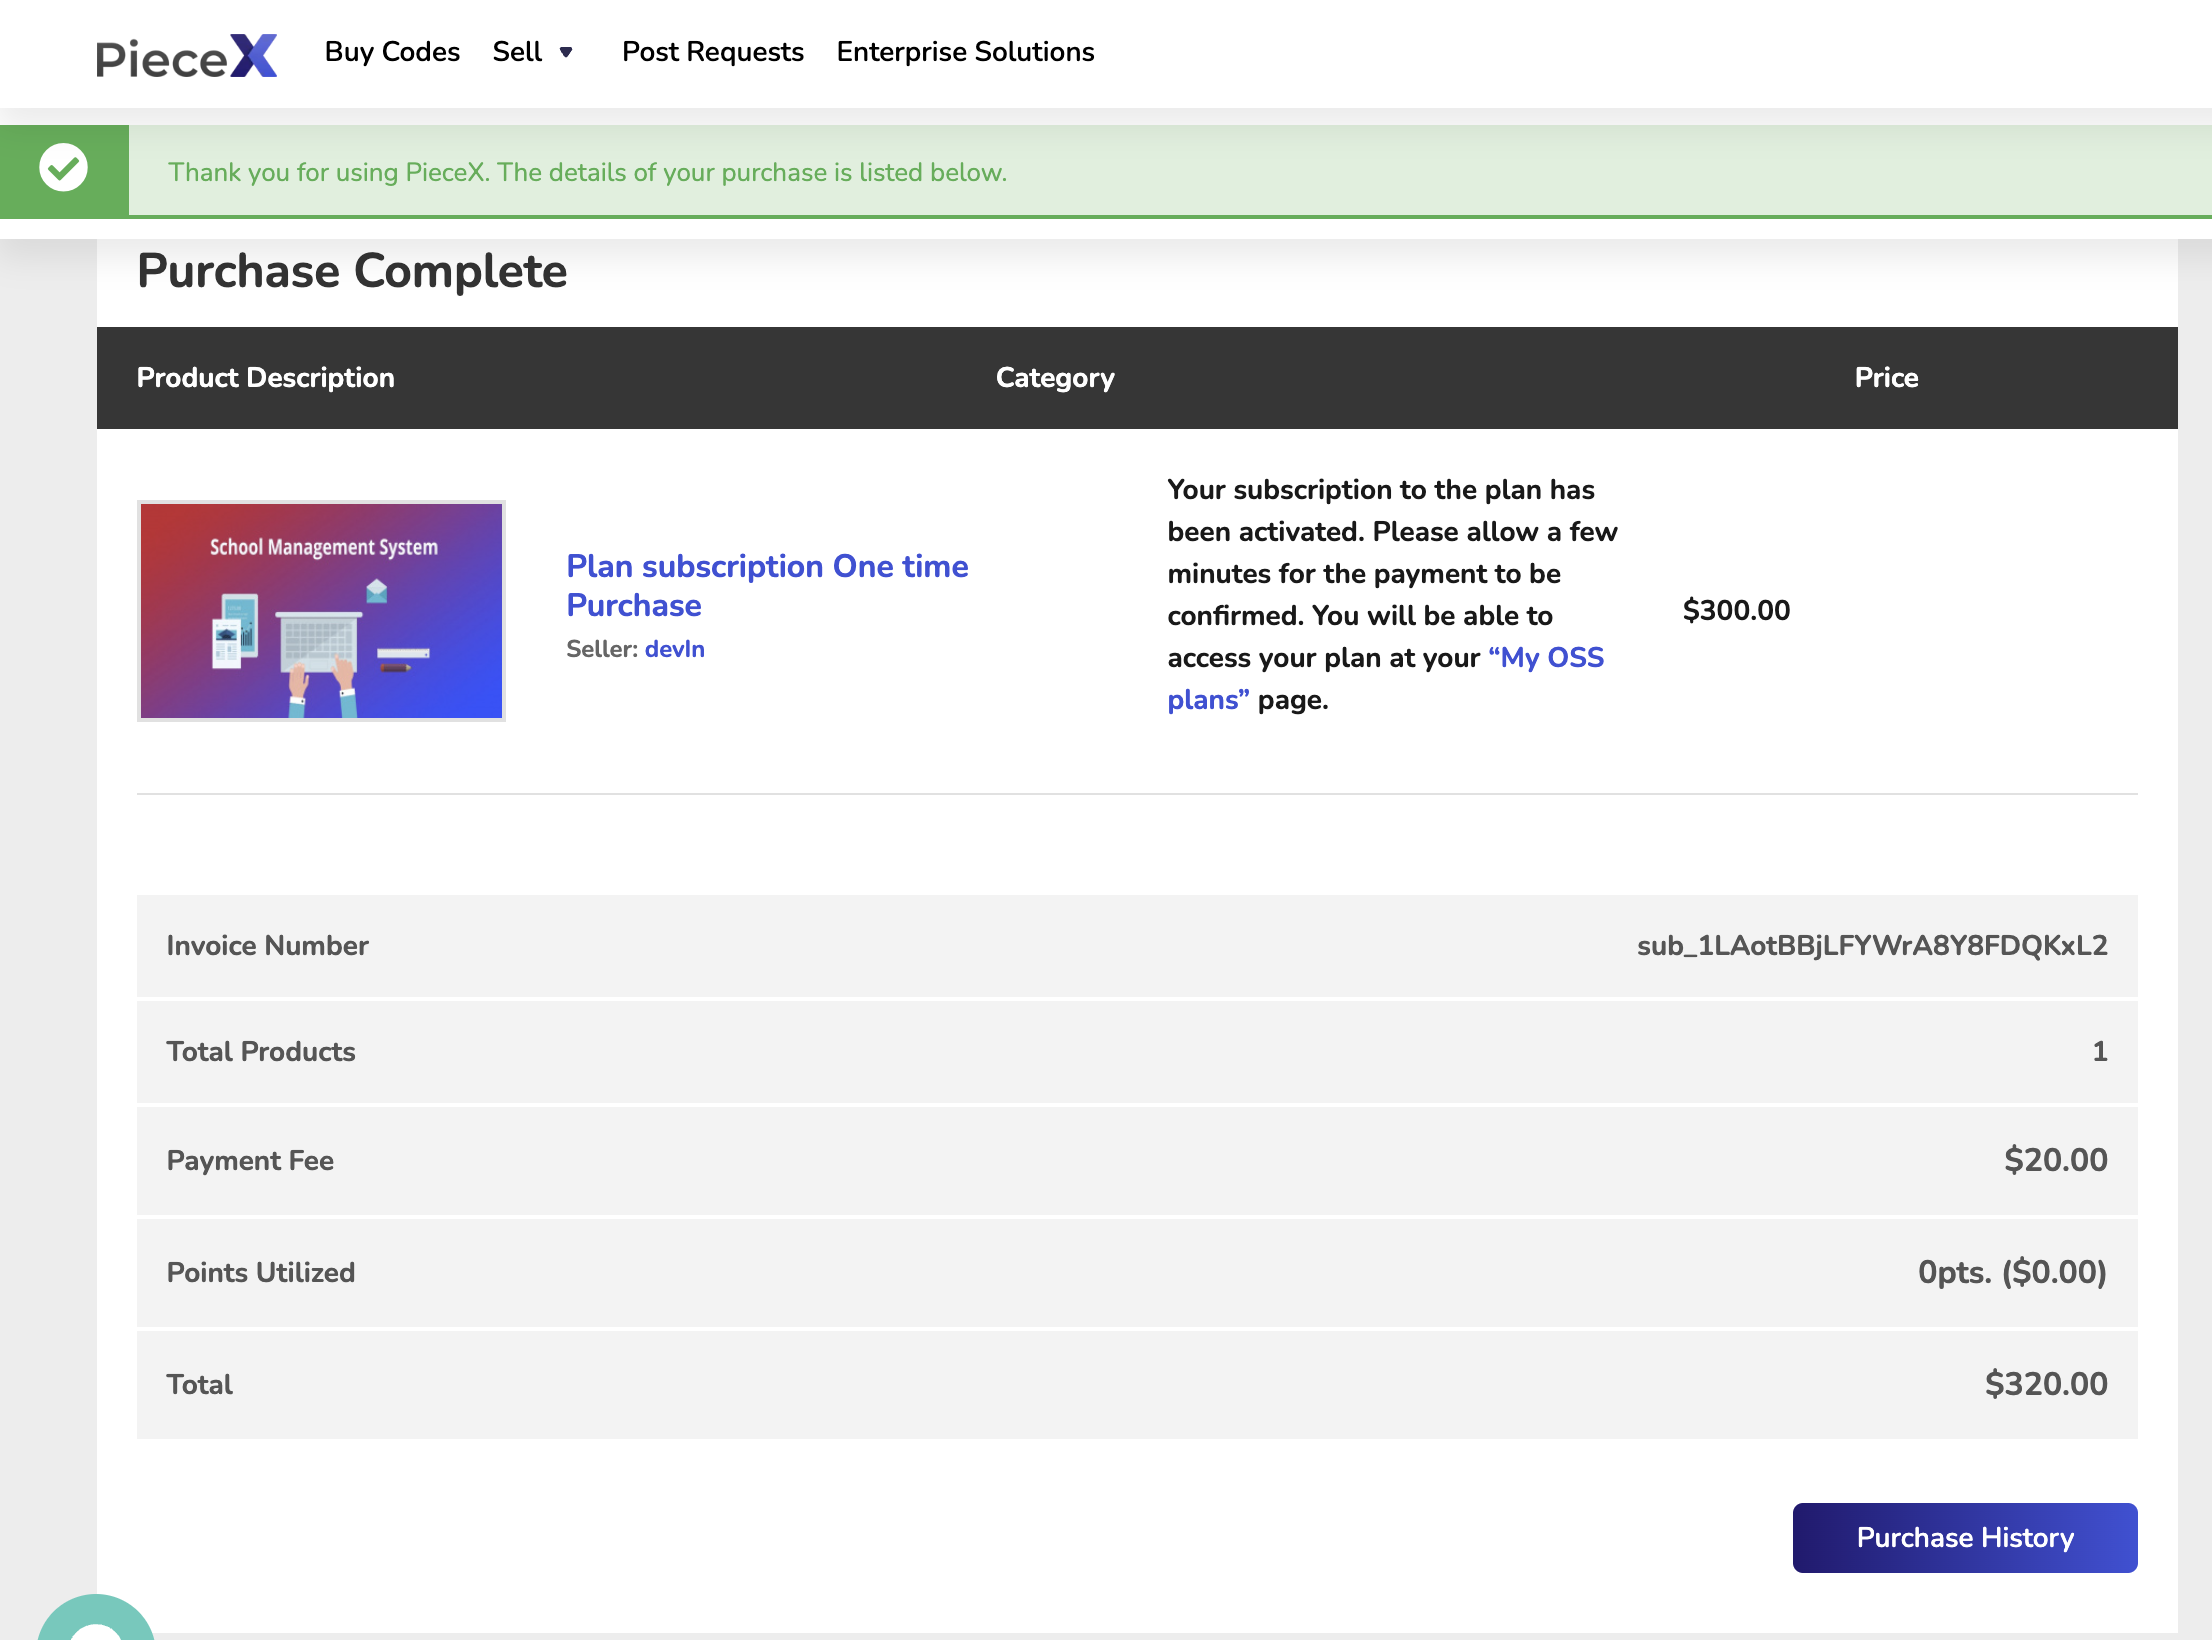
As soon as you complete your purchase, you will be redirected to the “Purchase Complete” Page.
Step 6: Access Plan
Head over to “Purchase History” to view your purchases.

Once you do, you will be able to click on “Access Plan” for the support plan you purchased.
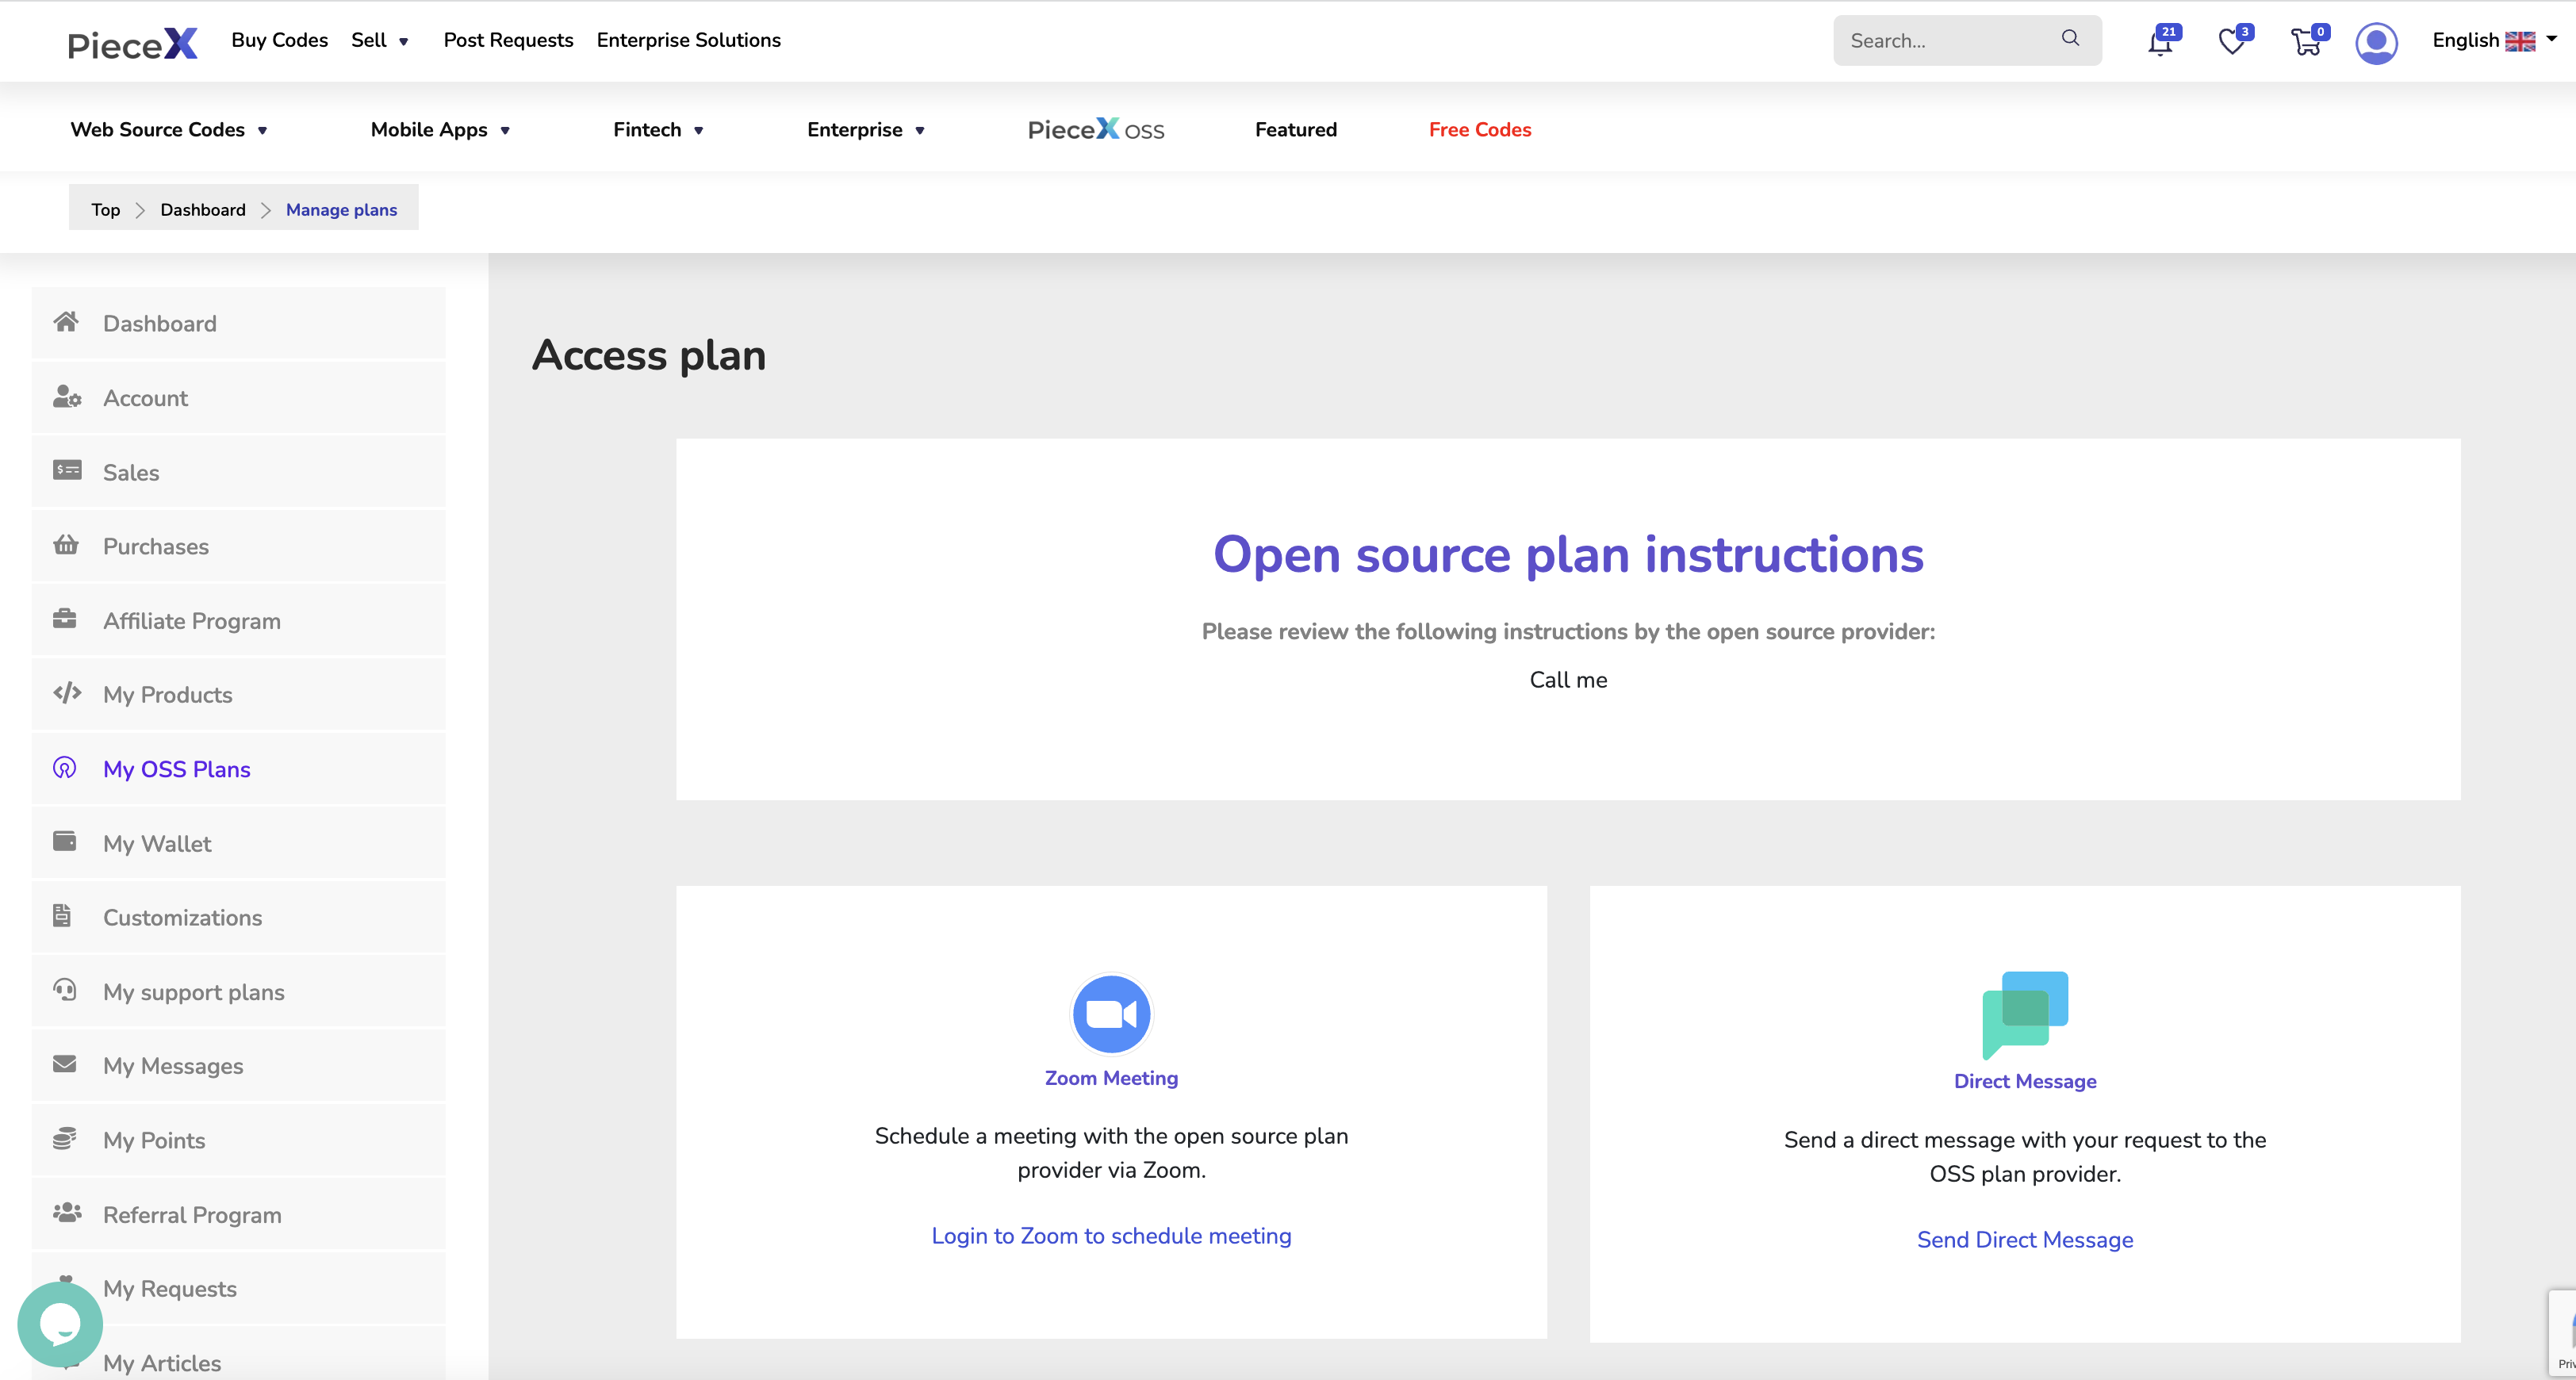
Clicking on “Access Plan” will direct you to this page where you can approach the contributor through scheduling a Zoom meeting or through Direct Message.
Conclusion
At this point, you’ll have purchased and gotten all the resources you need for your Open Source Code as well as the Open Source Support plan you need for your project. PieceX is the first platform to ever offer Open Source Support plans with this frequency, helping both users of Open Source Code and Contributors/developers and thus empowering the Open Source community.
For more tutorials, make sure to check our Knowledgebase Blog.

